Happy National Lipstick Day

IMG_0927

Happy National Lipstick Day!

…and to all my Canadian readers, have an awesome long weekend and enjoy your stat holiday 🙂

I created the image just for fun but tried to incorporate different colours and brands to share the love!  As I know I will get questions, here are the lip products I’m wearing:

Top Row (Left to Right)

ColourPop Ultra Satin Lip in Cozy

LUSH Cosmetics Lipstick in Passionate

J.Cat Beauty’s Liptitude in Hikilicious

Middle Row (Left to Right)

Laura Mercier Paint Wash Liquid in Rosewood

NYX Cosmetics Butter Lipstick in Hunk

Urban Decay Vice Lipstick (Comfort Matte) in Disturbed

Bottom Row (Left to Right)

Bite Beauty Amuse Bouche Lipstick in Spritzer

Urban Decay Vice Lipstick (Creme) in Rock Steady

Ofra Cosmetics Liquid Lipstick in Santa Monica

Twitter   |   Instagram   |   Pinterest  |   BlogLovin


(For full disclosure, please note that a couple of the links are shopstyle affiliate links.  The products were not selected on that basis.  There are many retailers I could have linked for info on the same products, so I figured why not link ones that reward me for selecting them (I can buy more products to review for you!.)  

Save

Ipsy Glam Bag – July 2016

image

Ok, let’s be honest…I’m a makeup addict!  I look at makeup as an art.   How can I transform my face differently?  How can I bring out my favourite features?  How can I add a pop of colour uniquely?  I’m not obsessed with makeup because I have low self esteem and it makes me feel better – it’s just fun playing around and putting on make up!

That being said, loving makeup and wanting to try new and improved products can get expensive.  So, last year, I decided to sign up for Ipsy.  Ipsy is a $10 US / month (+shipping) subscription service that sends you a glam bag (small makeup bag) with 5 deluxe samples or full sized products every month, selected especially for you based on preferences you select in their survey.  It’s the perfect way to try new products without the breaking the bank.   Plus, you get the excitement and anticipation of receiving the shiny pink package in your mailbox.

Click here to learn more about Ipsy and subscribe now!


Here’s what I got this month:

Continue reading

Review: Colourpop Ultra Matte Lips (Part 2)

Image-1(2)

I was liking my ColourPop liquid lipsticks so much that I bought two more (I know, I have a problem…):   Lumiere 2  and Cheap Thrills.

I have been LOVING purple lip shades ever since I purchased my Too Faced Melted Lipstick in Fig.  So I decided to see if there were other different shades of purple that I would like just as much (and that were also 1/3 of the price).

Continue reading

Pinterest Test #1: Date Night Eyeshadow Tutorial

I have been pinning eye makeup looks and tutorials on Pinterest for YEARS but I realized that I haven’t actually tried any of the looks out on myself yet…they are just sitting in my “Beauty Board” collecting dust (or whatever is equivalent online…).  That’s no good!

So, I’ve decided to challenge myself, over the next couple months, by selecting my favourite pins and trying them out to discover:

  1. If I can create this look with my existing affordable eye makeup?
  2. If this look works well on my/a different eye shape and/or colour?
  3. How helpful are the step by step images (if any)?
  4. What tips can I provide my readers to help you achieve this look?

On to today’s challenge…

b2bc6360f3f530f0c4b3d41d6f32cdef
Photo from fashionsy.com.

Today’s challenge is the look to the left entitled “Date Night Eye Shadow” (although, for me, it’s a spring/summer look that you could wear day and night).

I thought it was the perfect challenge to start with – a quick and easy look with a pop of colour using only 4 shadows + liner + mascara.  There are clear step by step images displaying both brush type and shadow colour.

I was optimistic that this would look lovely with my eye shape and colour as the model has brown eyes like me (plus, purple looks beautiful on all eye colours)!


Continue reading

Top 10 Beauty Hacks

I recently read Molly a la Mode‘s blog entitled “Realistic Beauty Hacks” where she shares a couple of her favourite beauty hacks….not the silly ones where you make mascara out of Oreos, or lipstick out of crayons.  True hacks that help you save time, money, or get you out of a last minute rut.

Two of the ones she listed, I regularly use and would highly suggest:

  • Using coconut oil as a makeup remover (it works especially well with ColourPop Ultra Matte liquid lipsticks…checkout my blog about those here)
  • Using conditioner instead of shaving cream for silky smooth legs.

Sharing her simple beauty hacks inspired me to share some of my faves with you.

Here are 10 of my most useful hacks, in no particular order:

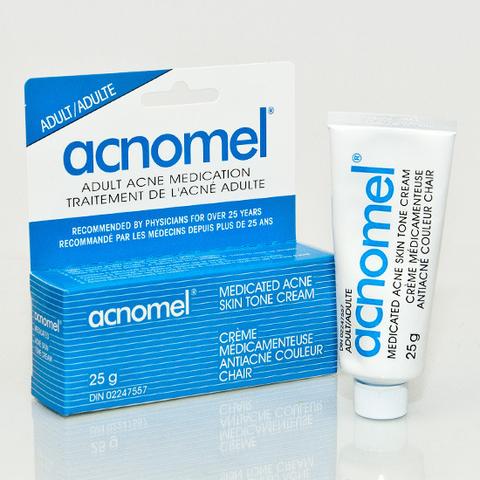
(1) Use toothpaste to shrink a pesky zit.

Dab a little toothpaste directly on a pimple to help reduce swelling and remove some of the impurities (plus, if it’s minty…it will tingle, removing any pain).

(2) Use bobby pins to get the last drop out of your toothpaste (or other squeeze tube products).

Place one bobby pin on each side, starting from the end, and align them so they are side by side.  Slide them toward the opening as you use up the toothpaste.   If you prefer to roll up your toothpaste at the end, you can also use bobby pins to secure it.

(3) Remove mascara clumps with an old wand.

Clean and save old mascara wands.  They are a great tool to separate lashes and remove clumps if you apply too much. You can also buy and use disposable mascara wands off ebay, like the ones you find at Sephora. These are also great for applying brow colour.  (check out my blog with more info about luscious lashes)

(4) Revive your nail polish with polish remover.

Is your favourite nail polish starting to dry out and get chunky?  Put in a drop or two of nail polish remover, shake it up, and you should get at least another 1-3 applications with it.  (Don’t put too much or the nail polish will apply patchy and never completely dry).

(5) Create beautiful waves with a twisted ballerina bun.

Before you go to bed, dampen your hair (or if you are a night bather, towel dry your hair).  Gather your hair like you were putting a ponytail on top of your head and start twisting it from the base/root.  As you twist it, wrap the hair around to form into a bun (it should naturally form into a bun as you twist your hair).    Secure it with a hair-tie, looping it over the bun 2-3 times.  Unwrap it in the morning and you will have beautiful, natural looking, beachy waves.

(6) Avoid embarrassing makeup blunders with natural light.

(not really a hack…more of tip to perfect your makeup)  Do your makeup by a window without artificial light.  Natural light is the most unforgiving so you will never leave the house again with uneven foundation, liner not completely filled it, or too much shimmer on your face.

(7) Use tape to give yourself a perfect french manicure.

Apply a piece of scotch tape to your nails, leaving the tip exposed.  Paint the tips white (or whatever funky colour you want).  Once dry, remove the tape and apply a clear polish on your entire nail.  BONUS TIP:  Use a small makeup or paint brush with nail polish remover to fix up any smudges or errors.

(8) Fix a manicure smudge with a lick of a finger.

If you smudge your nail polish during or right after application, simply lick your finger tip (I use my index finger) and, with that finger, wipe/slide the polish upwards towards the tip  of your nail.  Its a quick fix and works 75% of the time for me.

(9) Use dry shampoo before bed for fresh manageable morning hair.

(once again, more of a tip vs. a hack) I find that when I use dry shampoo in the morning, it makes my hair stiff and noticeably unnaturally matte (not to mention the occasional white powdery spots if you don’t massage some of the products in properly). Using dry shampoo at night gives the product time to absorb any access oil so your hair looks fresher in the morning.

(10) Q-tips are your beauty best friends!

Whether you need to clean up some inner eye makeup, perfect your liner, apply a dab of concealer, create nail art, or access that last drop of foundation in your bottle…the Q-tip (or cotton-swab) is there to assist and save the day.  I always have a box of them around just in case…

What are you favourite beauty hacks?  Try out some of mine, and let me know what you think!


Twitter
  |   Instagram   |   Pinterest  |   BlogLovin

Tried & True: My Concealer Journey

Dark circles, acne scars, or discolouration?  Foundation helps but sometimes you need a little extra coverage to feel your best.

Over the past 22 years, I’ve tried a variety of concealers depending on my needs at different stages of my life – liquids, creams and powders, medicated and cosmetic.  I’m definitely not a concealer expert, but I wanted to share my product journey with you in hopes that you can learn a little, laugh a little, and reflect on your makeup journey.

Before I start, I should mention that this blog is focused on products (vs. application).  I normally select concealers that are one or two shades lighter then my foundation.  If a product doesn’t come with a spongy tip, I dab it onto my skin with my middle or ring finger and then blend it in with a Beauty Blender.  For dark circles, I apply it in a half moon or triangular shape under my eyes and then blend it out. (Not mind blowing info…but more of an fyi).

In the beginning

acnomelAlthough it’s an acne medication cream, I have always considered Acnomel my very first concealer. When I was 11, I had a little acne so my mom bought it for me to help clear it up.   The product was tinted beige/tan, and I discovered that if I dabbed a super thin layer on my problem areas, it would cover them up.  So, although it wasn’t meant or marketed as a concealer, I used it daily to help treat and hide my acne (I went through MANY tubes …probably helped keep the company in business).

Does this make me look…orange?

When I began high school and started wearing makeup, I realized why Acnomel was not marketed as a concealer – once dry, it cracked, was cakey and sometimes had a slightly orange tint if I applied too much.  No one could see my zits, but they could see the dry, cakey, orange splotches all over my face.  Oy!

So, I went on a hunt to find a  new acne fighting concealer.  I wanted something that was easy to apply and blend, matched my olive skin tone, and helped clear my face.

Continue reading

Review: Colourpop Lippie Stix (with swatches)

As I mentioned in a recent previous blog, one of my new favorite brands is Colourpop (and not just because they spell “colour” like us Canadians)!  I have purchased their eye shadows, Ultra Matte liquid lipsticks, Ultra Satin liquid lipsticks, Creme Gel eye liners and Lippie Stix (…that is not a typo, they are indeed called “Lippie Stix”).

IMG_9750

The Lippie Stix are Colourpop’s modern take on a traditional lipstick, but instead of being short and stubby (like a classic lipstick), they are long and thin.  They are packaged in a white plastic twisty tube, with a lipstick colour matching tip, (and a white cap which is not shown in my photo).

The Lippie Stix come in 8 different finishes: Crème, Matte X, Satin Luxe, Sheer, Satin, Glossy, Matte, and Pearlized.  There is a HUGE selection and I have 11 swatched for you below.

Continue reading